About Hidden Fields in Forms

Hidden Fields Overview
- visible fields that the user fills in, or
- hidden fields with values that are simply returned to the server when the completed form is submitted.
| Visible Fields | Hidden Fields |
|---|---|
 |
 |
| Defined in the Form tab of the Form Builder. | Defined in the Configuration > Data Collection section of the Form Builder. |
| The user provides the values or accepts the defaults. | The values are included in the blank form and returned unmodified with the completed form. |
| The field type can be any of the predefined form fields. | The field type is always text. |
| Unlimited number of fields. | Up to 10 field identifier-value pairs. |
| Appear on the page or wherever the form is added. | If static, not displayed. If dynamic, appear as part of the blank form's URL. |
| The field's Title/Label becomes a column header in the table of responses. | The Field Identifier becomes a column header in the table of responses. |
Like the Title/Label of visible fields, the hidden Field Identifier can be any label you want to assign to the field.
Example uses: You can use hidden fields to associate a sale with a marketing campaign, to associate a candidate's job application with the job fair where the candidate was sourced, or to associate customer feedback with the representative that provided the support.
Hidden Values
The hidden values can be static or dynamic.
Static. You provide the exact text to assign to the field for all responses to the form you are configuring. Hidden fields with static values are not visible to the user.
Dynamic. You define a unique placeholder (enclosed in curly brackets {}) and place it in the Field Value box. When you send out the form's URL, you must assign a value to that placeholder in the form's URL. If the form is accessed from another page in the website, not through its direct URL, the placeholder value is blank.
Example: If Field Identifier is My Store Branch, and Field Value is {branch}, then the form's URL could be http://example.com/mypage?branch=San%20Mateo.
Configure Hidden Fields
- To add a hidden field and its value, fill in the Field Identifier and the Field Value. Then click/tap Add.
- To edit a hidden field and its value, click/tap the pencil icon next to it, and make changes. Then click/tap Save.
- To delete a hidden field and its value, click/tap the trash icon next to it, and confirm.
Example
Suppose that you are organizing an event ("2016 User Convention") and you want people to respond to the invitation by filling out a form with their names and email addresses. You also have partners who will advertise the event in their own websites and blogs, and you want to track how many responses you get through each partner.
-
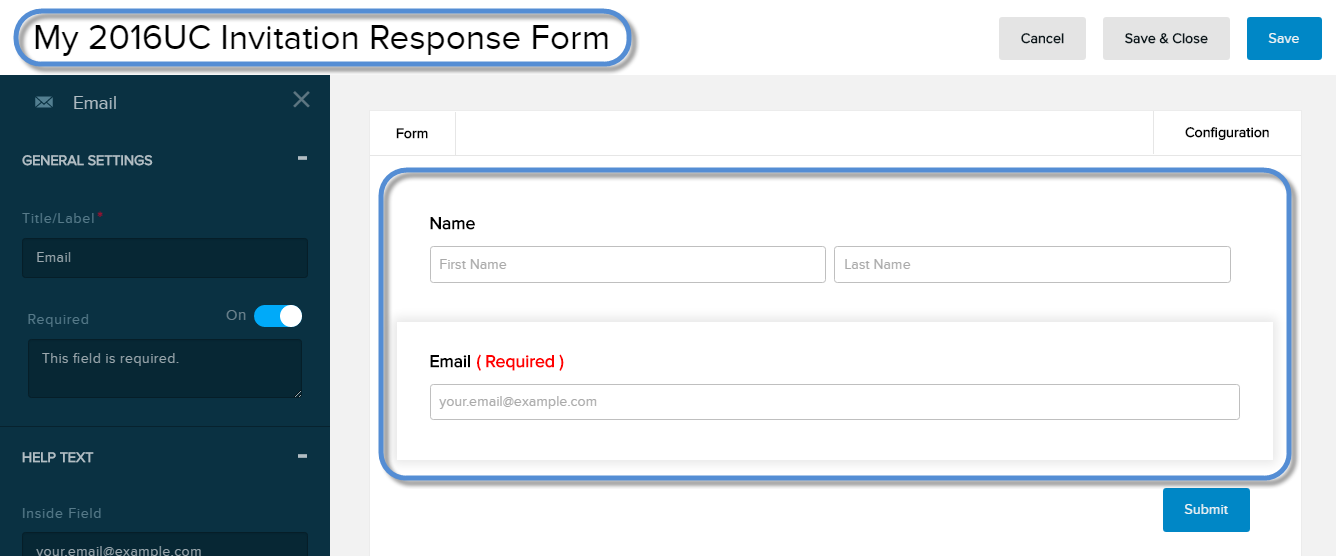
Create a form called My 2016UC Invitation Response Form. In the Form tab, add the fields Name and Email. Optionally, you can set Email as Required.
-
Go to the Configuration tab, then the Data Collection tab. In the Hidden Fields section, create these identifier-value pairs:
Field Identifier Field Value Event Name 2016 User Convention Partner {PartnerID} 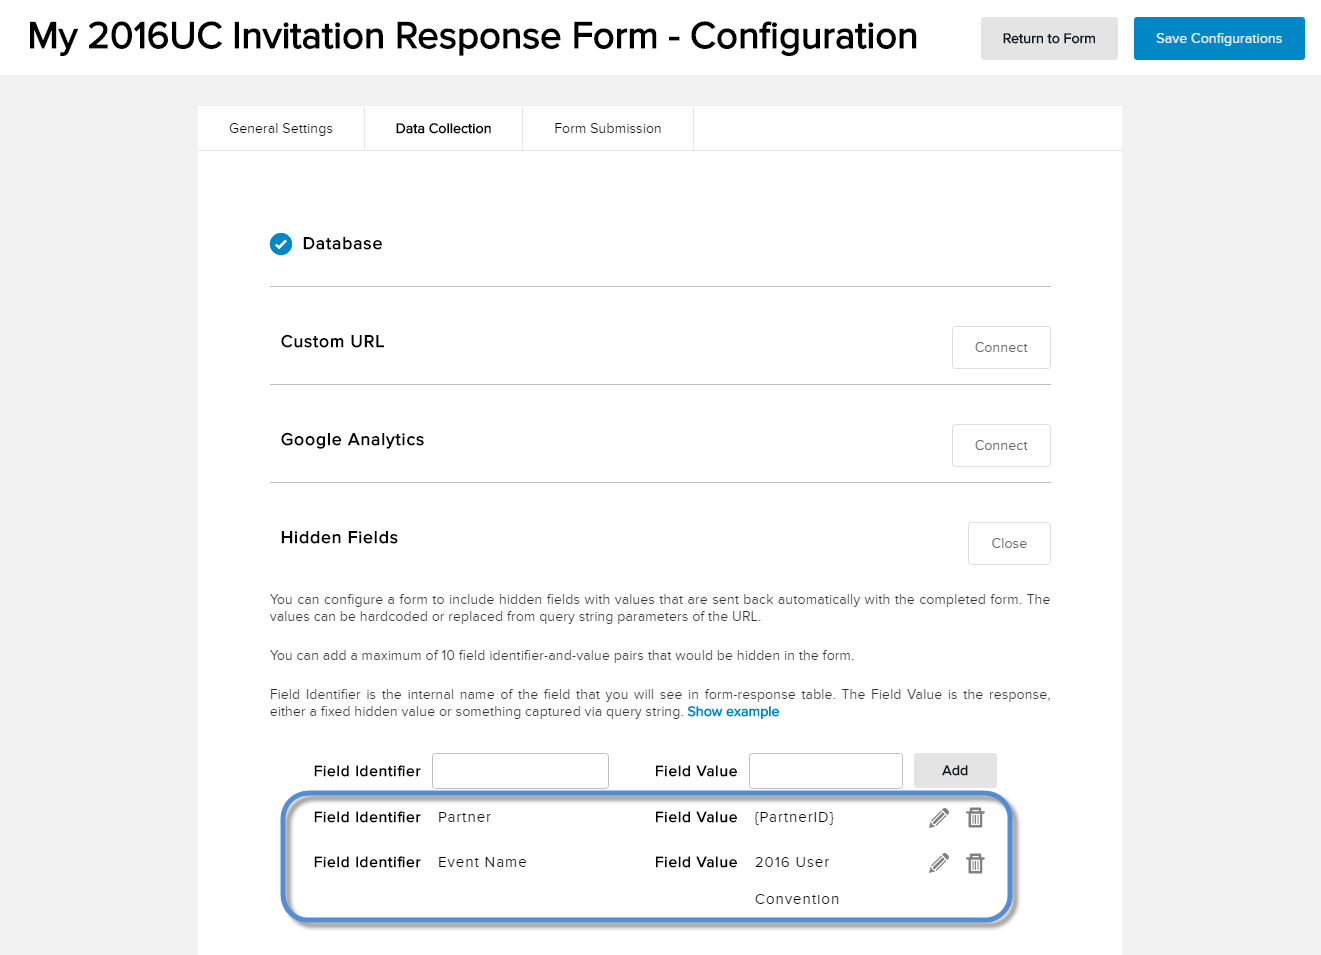
- Save the configurations, then save the form.
-
Create a new page called My New Page. Add the form to it, using any form style. Give View permissions to All Users. Then publish the page.

- Note the URL of the new page. In this example, we will use http://example.com/My-New-Page, which you will replace with the URL of your own page that contains the form.
- While on the new page, enter a random name and a random email address, then Submit.
Form URL Name Email http://example.com/My-New-Page Delphia Fredrickson [email protected] 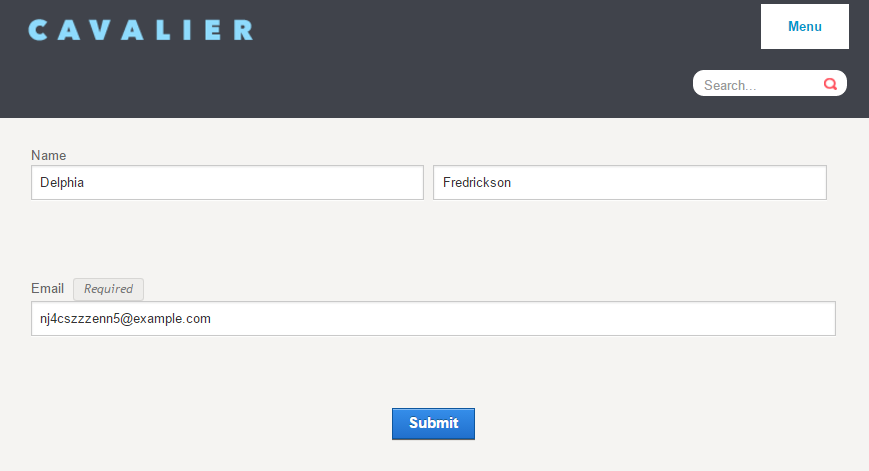
-
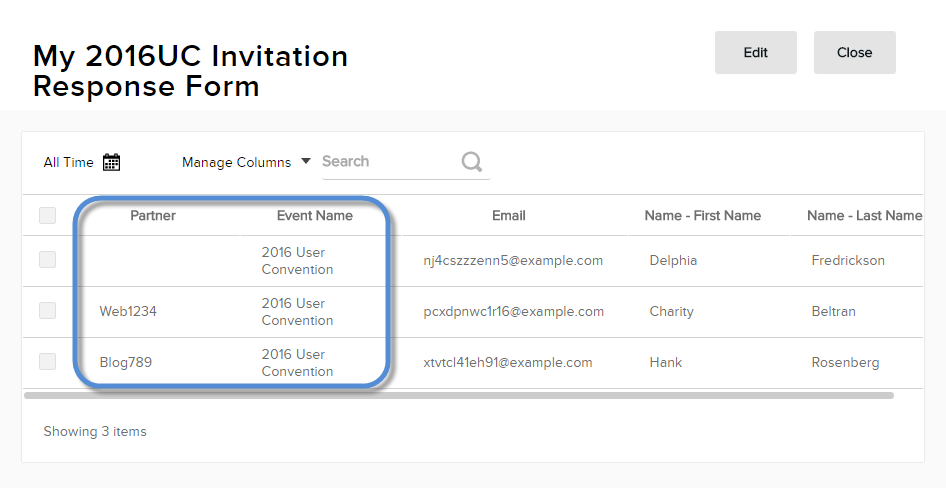
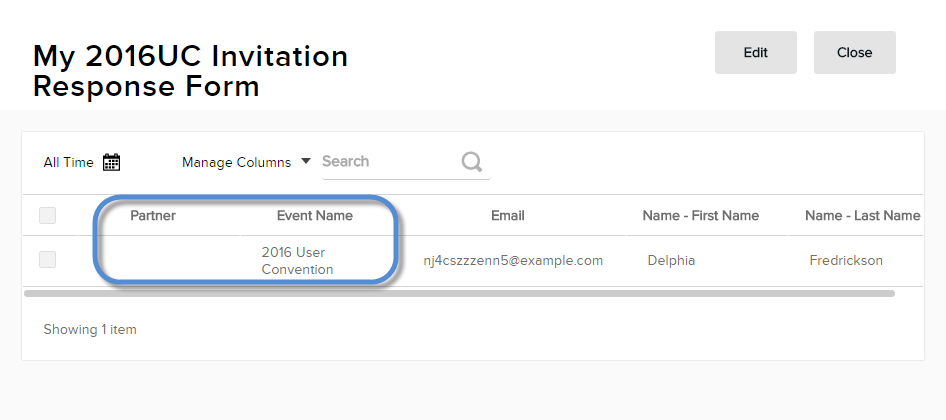
View the form responses. Note that Partner is blank and the Event Name is filled in.
- Suppose you have two partner sites and you assign them the codes Web1234 and Blog789. To track which partner generated a response, you must give each partner a different URL with a query string that includes the partner's code.
- For partner Web1234, the URL is http://example.com/My-New-Page?PartnerID=Web1234.
- For partner Blog789, the URL is http://example.com/My-New-Page?PartnerID=Blog789.
- To test, access the form through the browser's address bar using the URL with the partner's code, and fill in the fields.
Form URL Name Email http://example.com/My-New-Page?PartnerID=Web1234 Charity Beltran [email protected] http://example.com/My-New-Page?PartnerID=Blog789 Hank Rosenberg [email protected] -
View the form responses again. Note that Partner is filled in with the PartnerID value that you specified in the form's URL.