Configure a Module on a Page via the Control Bar


The Control Bar is visible to administrators and hosts. See Configure a Module on a Page via the Persona Bar as a content manager.
Steps
-
Go to .
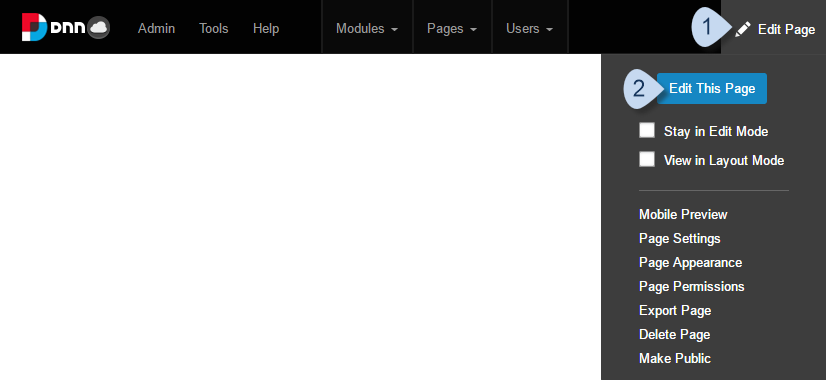
-
In the module's action menu bar, go to .
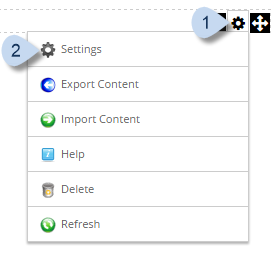
-
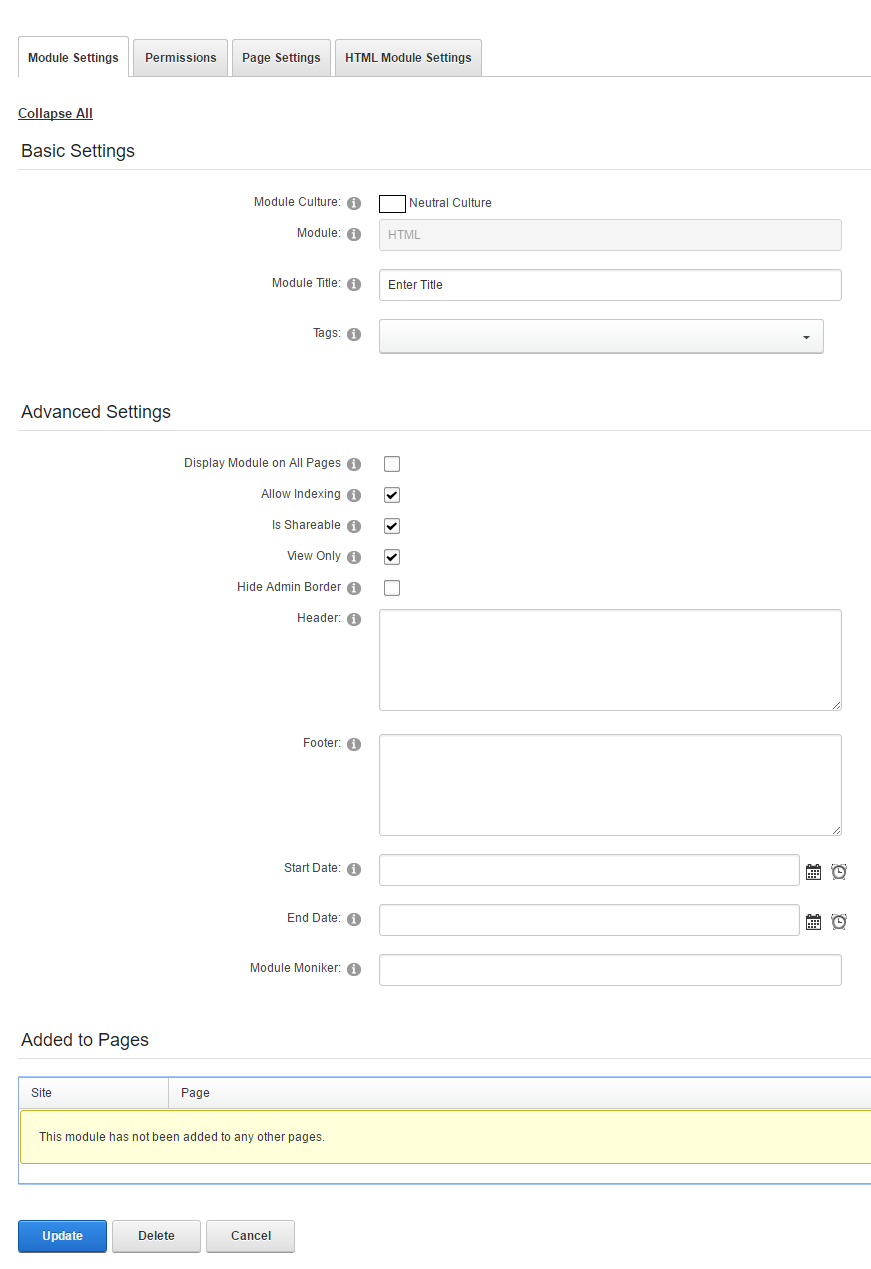
In the Module Settings tab, configure the settings of the module instance.

Note: Changes to these settings will affect the display of the module instance wherever it is referenced.Module Settings — Basic Settings Module Culture If the module is available for different cultures (language-region), choose which one to use for this module instance. The default is Neutral Culture. Module Title Appears in the container's title bar, if the container supports it. Tags Predefined tags that you can choose from the dropdown, if any are defined in the Taxonomy Manager. Module Settings — Advanced Settings Display Module on All Pages Administrators: If checked, the module appears in the same position on all pages in the site. Is Shareable If checked, the module can be shared across sites. View Only If checked, the module is shared across sites as viewable only. Hide Admin Border By default, a border appears around the module if the user is an administrator to indicate that this module is visible only to administrators. If checked, the border is not displayed. Header
FooterEnter text that you want to display before (header) and after (footer) the module content. Start Date
End DateClick/Tap on the calendar icon to choose the date (server date); the default is the current date. Click/Tap on the clock icon to choose the time; the default is 12:00 AM (server time).
- The module is published after the specified start date. If Start Date is not set, the module is published immediately.
- The module is hidden after the specified end date. If End Date is not set, the module is visible indefinitely.
Module Moniker An identifier for the module. The identifier must be unique within the page. -
(Optional) In the Permissions tab, configure which roles can do which actions on this module.
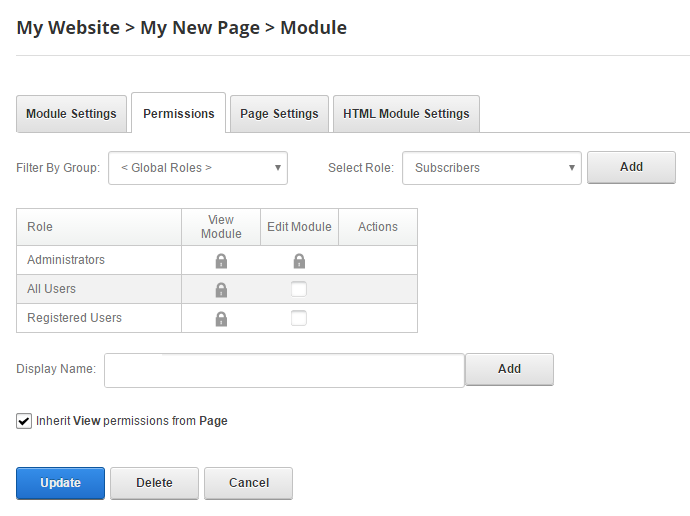
- (Optional) To filter the displayed roles, select the role group from the Filter By Group dropdown.
- (Optional) To add another role to the list, choose the additional role from the Select Role dropdown, and click/tap Add.
- (Optional) To add a specific user to the list, enter part of their display name, select the correct user from the list, and click/tap Add.
- (Optional) Check the appropriate checkboxes to enable each role to perform actions on the module.
- (Optional) To specify view permissions that are different from the parent page, uncheck Inherit View permissions from Page.
-
In the Page Settings tab, configure the page-related settings of the module instance.
Note: Changes to Page Settings will affect only the page where the module instance is.Page Settings — Basic Settings Icon The icon to be displayed in the module's title bar.
- Choose None if you do not need an icon for the module.
-
Choose File to provide your own file.
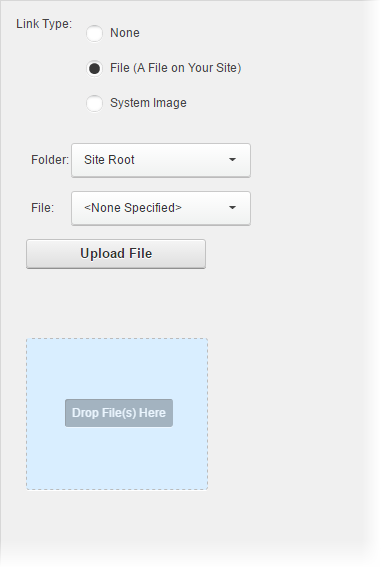
To choose a file that is already on your site,- Select File (A File on Your Site).
- Choose the Folder where the file can be found.
- Choose the File.
To upload a file,- Select File (A File on Your Site).
- Choose the Folder where the uploaded file should go.
- Drag and drop the files from your local storage to the Drop File(s) Here area.
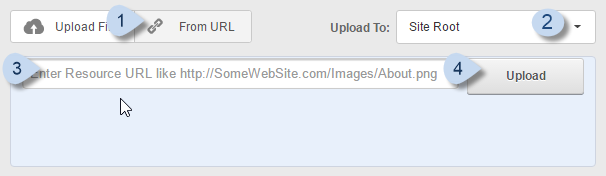
Alternately, you can copy a file from a URL to your site.- Select File (A File on Your Site).
- Click/Tap Upload File.
- In the Upload Files dialog,
- click/tap From URL,
- choose the target location on your site,
- enter the source URL, and
- click/tap Upload.
-
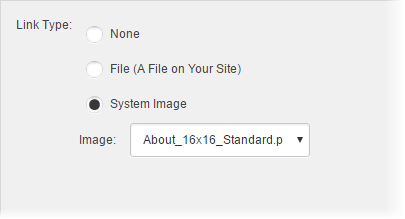
To choose an image that shipped with DNN,
- Select System Image.
- Choose the image from the Image dropdown.
Alignment The default alignment of the module content. Choose Not Specified to use the setting in the container or theme. Color The color name or hexadecimal RGB value for the background of the module. Leave blank to use the setting in the container or theme. See Wikipedia article on Web Colors. Border The width (in pixels) of the border around the module. Leave blank to use the setting in the container or theme. Collapse/Expand The default visibility of the module. - Maximized. The module is expanded.
- Minimized. The module is collapsed.
- None. Uses the setting in the container or theme.
Display Container If checked, displays the container of the module. Allow Print If checked, the contents of the module can be printed. Allow Syndicate If checked, RSS is enabled on the module. Is a WebSlice If checked, the module is converted into a Web Slice, which is a portion of a web page that can be subscribed to for updates. Introduced in Internet Explorer 8. See the FAQ about Web Slices at Microsoft.com. Web Slice Title A name for the Web Slice. Web Slice Expires If blank, the Web Slice expires at the same time as the module. Web Slice TTL Time to live (TTL), in minutes. If blank, this value is the same as the module's time in cache (in minutes). Module Container The container to use when the module is displayed. Cache Settings Output Cache Provider The cache provider to use for this module. - Database saves cached items to the database.
- File saves cached items to a file system. Ideal for a shared hosting environment.
- Memory saves cached items in memory. This is the fastest caching method. Ideal if the website has a large amount of RAM. Not suitable in a shared hosting environment.
Cache Duration (seconds) The number of seconds that the module results would be stored in cache. Must be an integer. Page Settings — Advanced Settings Set as Default Settings (Administrators only) If checked, the settings for this module are used as the default for future modules. Apply to All Modules (Administrators only) If checked, the settings for this module are copied to all existing modules. Move To Page The target web page where the module would be moved to.