Enable and Set Up IIS


Prerequisites
Steps
- Enable IIS.
- Go to .
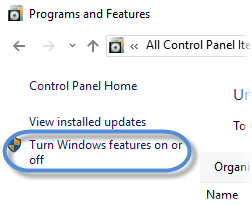
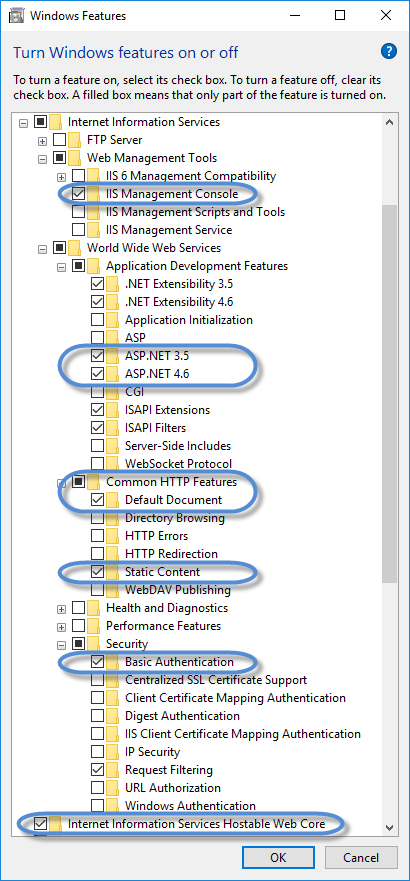
- Under Internet Information Services, turn on the following:
- Web Management Tools: IIS Management Console
- World Wide Web Services
- Application Development Features: ASP.NET 3.5 and 4.6
- Common HTTP Features: Default Document and Static Content
- (Optional) Security: Basic Authentication
- Internet Information Services Hostable Web Core
- Go to .
You can create a new website or set up an existing one for use with DNN. Choose one of the next two steps.
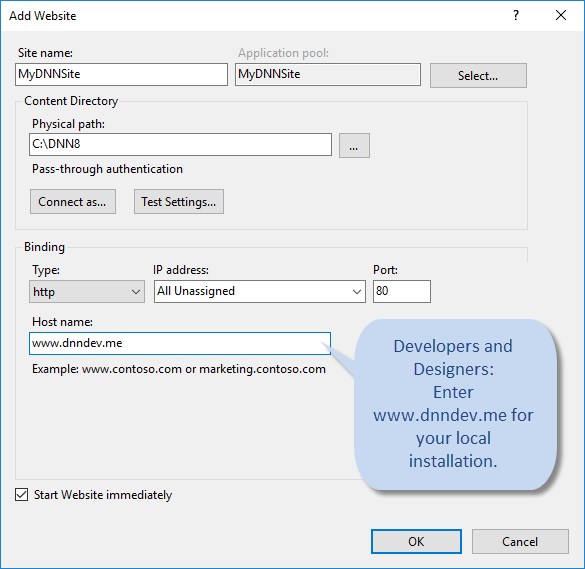
- To create a new website and point it to the DNN installation folder:
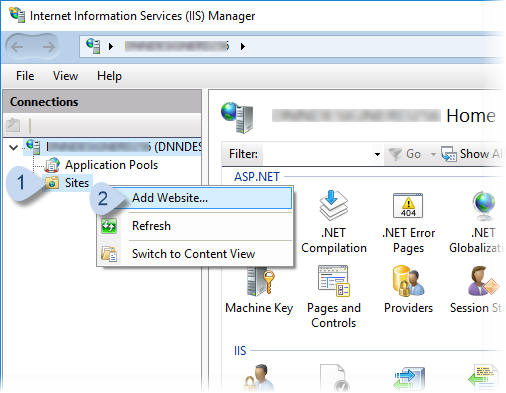
- In the Connections panel, expand your host tree, right-click on Sites, and choose Add Website.
- Enter the new website's name and choose the location.
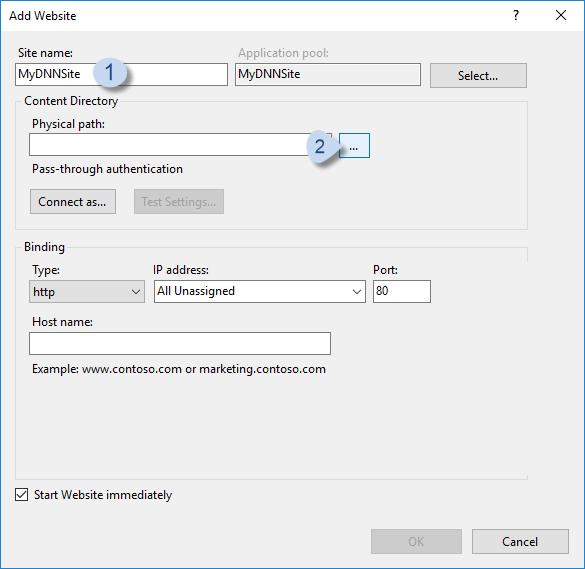
- Enter the Host name.
Developers and Designers: If setting up a local development environment, you can use
www.dnndev.me(or any subdomain). DNNDEV.ME is a registered domain which points to the loopback address of 127.0.0.1, so it will always resolve locally.Administrators: If setting up a live website, use your website's domain.
- In the Connections panel, expand your host tree, right-click on Sites, and choose Add Website.
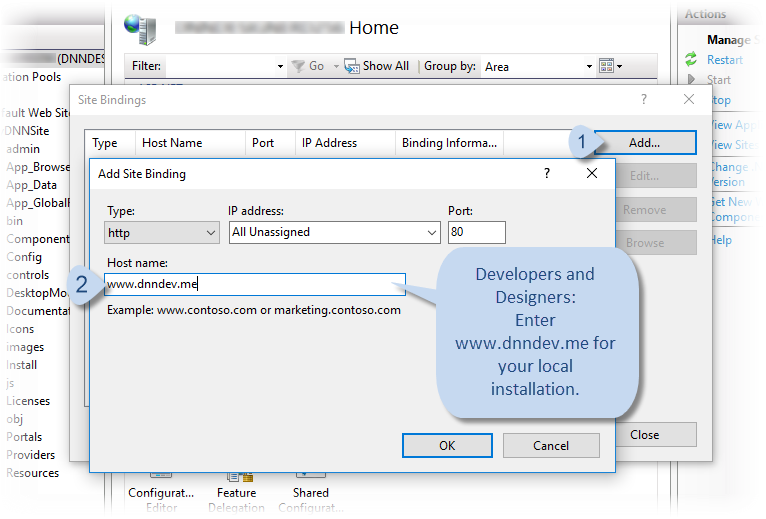
- To use an existing IIS website:
- In the Connections panel, right-click on the name of the existing website, and choose Edit Bindings....

- In Site Bindings, click/tap Add.... In Add Site Binding, enter the Host name.
Developers and Designers: If setting up a local development environment, you can use
www.dnndev.me(or any subdomain). DNNDEV.ME is a registered domain which points to the loopback address of 127.0.0.1, so it will always resolve locally.Administrators: If setting up a live website, use your website's domain.
- In the Connections panel, right-click on the name of the existing website, and choose Edit Bindings....